Showing posts with label Ryan works very hard. Show all posts

Porch bar with industrial corbels

We had wanted a table with chairs on the porch, but weren't sure about the space.  Instead, we settled on a custom back bar.  Using a long piece of 2 in cedar, we installed this using galvanized pipe as corbels.   They were a bit pricier than I would have liked, but we love the look. And, of course, it wouldn't be complete without our stools from Cameron's!


Reclaimed barn wood pendant lights

When designing the lighting for the porch, we wanted extra lighting for the back bar area.  Drawing inspiration from these great lights,
Source
Source
And using reclaimed wood and lights from Lowe's with Edison bulbs, we made this.

Bonus: it matches the mantel!


Front Door Redo on a Budget


Our front door:  not the most impressive. 

It’s a standard metal door, which the builder dressed up with wood trim.  (Don’t you like how this Arrow points at the rusty spots on the lantern? 0 We discussed replacing the door with something new, but kept hearing about problems with hanging a new door in the old door’s place, and the cost to rip it all out and replace the unit was not in the budget. Plus, this door works great!  I absolutely hate replacing anything that isn’t broken. 

So, we decided to give the existing door a makeover.

 Front Door Exterior Before

First, Ryan used a razor to cut through the paint between the trim and the door.

006

Next, he pried the trim off of the door.  It had been nailed and glued on, but came off quite easily.

007

He then patched all the holes with Bondo body filler.

013

And then sanded and sanded and sanded and sanded.

015

The end result was pretty cool – all those layers.

050

This is how it looked from the street after he finished sanding it.

048

Next, he took leftover beadboard from our Laundry Room makeover and cut to size.

Front Door During 04

Then glued that directly to the door.  Initially, we were going to center this piece, but luckily realized that the bottom of a door will typically have greater width between any decorative elements than the top of the door. The piece is centered horizontally, but has much more space on the bottom than the top.

Front Door During 05

He then added decorative trim around the beadboard, caulked, primed and painted.

The BEFORE.

Front Door Exterior Before (2)

The AFTER.

DSCF3317

Now wait until you see what he did to the inside!!!!

And yes, I also painted the rusty lantern.  Door swag from Cameron’s in Downtown Lee’s Summit.

Laundry Room Redo


We finished redoing the Laundry Room!

Laundry Room Redo

This is the before.  What you can’t see here is the blue countertop, the scratched up sink, the damaged walls or the stained, peeling, disgusting linoleum floors.  You also can’t see inside the cabinet where previous homeowners scrawled

BLOCKBUSTER 785-4652

and

BANK OF AMERICA 800-468-5000 #1850-68775499

in Black Sharpie marker. No kidding.

It was amazing to me what the simple addition of the molding on the cabinets made.

Blog uncompressed 062

There was this wasted space between the door to the room and the washing machine—like a closet with no door.  There was a clothes rod that hung on the bottom portion of the white framing below.  (I failed to get a before picture)  We use the rod for drying clothes, and wanted to raise it up to allow for hanging clothes space after we added built in shelves.  We talked about ripping out the wood support, but then would have to contend with patching the walls.  Ryan had the great idea to just “beef” up the framing.  He added a 2x10 and then a 2x4 and attached decorative trim. 

049

It gives it a cabinetry feel and it also made a great place to display this 1916 Singer sewing machine that belonged to my grandmother.

1916 Singer Sewing Machine Laundry Room

the space below the rod was empty.  We kept a laundry hamper here.

050

Based on this inspiration, http://pinterest.com/pin/37999190575828656/, we built this.

Laundry Basket Shelves

Ryan says it’s working great!

We also replaced the countertop, sink and faucet and tiled the backsplash.  We tiled the floor, did wall repair and added bead board to each side of the room and added molding to the top of the cabinets.

Laundry Room Counter

The tile was a great find. Costco for $5.55 a square foot.  It has travertine, glass and emperador dark marble.  The SAME marble that we used as an accent in the kitchen backsplash and to tile the fireplace in the Hearth Room: the areas that adjoin the Laundry! 

And the countertop?  $40 at Sutherlands! It was the last piece they had.  We use the galvanized bucket on the counter to keep our dust rags in.

Laundry Room

We are super pleased with the end result. 

Replacing and Centering a Light

When we moved in, the main light in the Dining Room and the niche for the buffet were each centered on different parts of the room.  And it drove me crazy.  You can kind of see in this photo how the table is centered on the buffet, but the light is not centered over the table. 

Blog uncompressed 148

Turns out there is a bedroom immediately over this room, so we had no real access to the space in the ceiling.  But, when we replaced this light

entry way light before

with this light in the entry,

Entry Way Light Z After

I knew that when Ryan centered the Dining Room light, I wanted him to swap it out with the old Entry Way light.

This weekend, he went to work.

We moved the furniture, threw down some old sheets, took down the original Dining Room light and started measuring.  After we decided where the new light would go, Ryan cut a new hole

DSCF0820DSCF0823

When that was done, he used this from Home Depot.

DSCF0816

It slips into the new hole and tightens (like a tension rod for a shower curtain) until it “bites” into the joists for support.  The electrical box is then attached to it, pulling the wires from the old hole through the new.

DSCF0828

We’d taken the light apart, too, for easier hanging.  That sucker was heavy!

DSCF0808

But not nearly as heavy as the replacement light in the Entry.  Wow!

And we also used a medallion from Lowe’s so that we could hide the old hole.  Much easier and cheaper than repairing the ceiling, and I really like the look.

DSCF0824

And here she is all put back together. And centered at last!

DSCF0836

DSCF0839

My mom came by and was NOT blown away by the change, but I love it!

Linked to  Savvy Southern Style

Lifting Elephants

…Ears, Cannas and Gladiolas.

That time of year.

Remember my Black Magic Elephants Ears?  They did GREAT this year. I bought 2 bulbs from Lowe’s at $20 a bulb! Not a typical purchase for me, but I wanted them REALLY bad.  Ryan was with me and I pretended shock when we got to the check out. But really, what’s he going to do then? Not get them?! 

Plus I told him that I could lift them in the Fall, so next year, they really only cost $20, then the next year $10, then $5…and so on and so on.  If you think about it, those things are an INVESTMENT!

image

I also had two fabulous Cannas in a pot with some bamboo my neighbor gave me.  I think I paid $5 for the Cannas. The did great and bloomed all summer.

Blog uncompressed 064


Blog uncompressed 063

And I’d gotten about 50 gladiolas for $5 in mid-summer, which is late.  I got them in the ground, but only about 5 bloomed.  I’ll get them in the ground earlier next year, and they should do better.

Starting to get some early morning light frost, so, last weekend I dug them all up, separated what I could and have spread them out in the basement to dry. I’ve got all my originals, plus about 18 baby Elephant Ears! about 10 more cannas, and about 80 glad bulbs.  YAY!  If I can keep them from rotting, it’ll all be good.

I typically have good luck with saving bulbs (or corms or whatever). However, last year I had a bunch of caladiums, but failed to dry them properly before storage.  ugh….they were a soft, mushy mess when I pulled them out in the Spring.  I learned my lesson.

007

Here’s to having a plan and sticking to it. And really, it’s like growing money…right!?!?

Where's the Fire?

I'm all about the outdoor posts lately!

Last weekend we had a fire in our backyard.  In a good way.

You know the leftover Pavestones from under the deck - HERE?  When we poured the patios and sidewalk, Ryan piled them up in the backyard. Can you say "White Trash Hillbilly"?  Ryan, of course, wanted to haul them to the dump. No, really, he did.

Then, the inspiration came.  He turned this


Into this!


And all in one afternoon.

But we needed a better way to get up and down the slope - especially after it got dark and after a few beers.

So, he built this.


And last Saturday, we did this!


It was a ton of fun. We laughed, talked, sang, did skits, told stories...a really great time.

And all FREE!  Or, as Ryan likes to say, Free, except for his Chiropractic Bill.

Linked to Remodelaholics were we were just featured - HERE! Thanks!

Were we really crazy?

Wow!  Things have been crazy around here.  We had WONDERFUL house guests last weekend: Ry's bro, Dave, his wife, Renee, and their son, Cayman.  And Ry's sis, Terri and her H, Scott, got to come by Saturday night, too. 

So much fun: talking, laughing, eating, drinking and making merry! And then the Chief's game! oh, yes. (sorry, Renee, but, at least this year someone went home happy!)

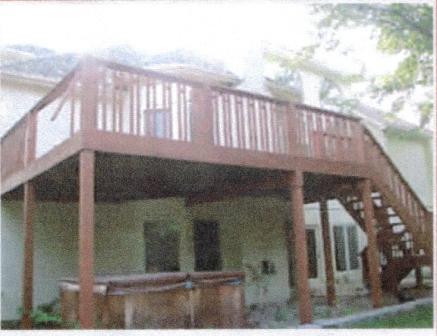
As it always seems to happen with house guests, you rush-rush to finish up all those tiny details, which is great, but can be tiresome.  One of mine was to finish up the office (not there yet...but almost!), and in the midst of my getting organized, I ran across a couple of pics from the home inspection report that was done before we bought the house.   Here's the before and afters of the deck and under the deck. I think this gives you a really good taste of where this entire project began.

Here's the upper deck.  The broken railings are obvious, but it's really hard to appreciate the sad state of the wood.  I don't believe the cedar had ever been retreated.  And there was that weird greasy/oil stained area in the lower right of the photo. Oh, and some rotting boards, too.


We repaired the railing, replaced the rotting boards, powerwashed, sanded and stained the deck.

Here she is now.


She'll need another stain job soon!

Here's below the deck. This was great!  That's all gravel and tree-like weeds growing there.  The rotting hot tub was filled with grody water and tadpoles. yummy.


The gravel was contained by the Pavestone blocks.  And the gravel wasn't really thick enough to cover all the mud and dirt, that's why we had so many of those tree-like weeds growing in there.  We cleaned, rebuilt and moved the hot tub, poured some patios, put in a stone path and landscaped under here.

And here's the after.


Man, looking at these before photos make me question our sanity.  I think I have forgotten the level of disrepair this poor house had been left to.  But it also makes me thankful that we have the opportunity to bring her back and really make her ours.

And while we're at it, we are having some windows replaced in our bedroom. I was taking pictures of the workings of the casements for window guy, and got this pic by leaning out the window from our bedroom.


It sure looks pretty from up here! Makes me want to add a door and a deck off the bedroom.  Think Ryan will go for that?

Linked to FIF at Chic on a Shoestring Budget and RemodelAholics!